 |
| Quick snap of a commission before relinquishing it |
Sometimes, I get asked how I make my own jumpers and cardigans (etc), using my knitting machine. I have a couple of different ways of coming up with my knitting patterns, but mostly I try to make my pieces fully finished, that is, that they do not need to be cut after knitting in order to put together.. Here I will explain how I trace a pattern from an existing garment. I have simplified the process, but you should be able to get the idea.
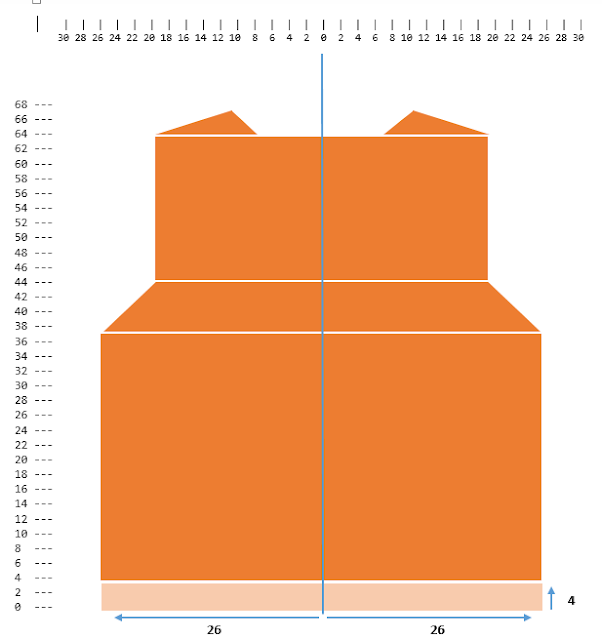
Lay the piece out as flat as possible. This is a back piece with a hem at the bottom.
Now, separate out the sections. The idea is that in each section, the change in width should be constant.
Although the width is different at the start and the end of the middle section, you should be able to calculate the decrease from the height and the starting and finishing width
Measure the starting width from the centre (on the knitting machine, the centre position is marked as 0). For asymmetric pieces this may be different on each side. Measure the height of this section. Remember to add on seam allowance. As a rule, I add about 1cm, generally I sew the item up before washing and blocking, so you should have more than 1 cm before washing, unless the shrinkage rate of the yarn is 0.
Note here that the starting width differs from the finishing width. When reading the pattern in rows and stitches rather than cm or inches, you can work out the rate to decrease/ increase by.
In this last section, the left and right parts will have to be knit separately. Note that piece starts 8 cm away from the centre, and finishes 10 cm away from the centre. That means you will want to decrease from both sides at different rates. You will also have to make a section of height 0 before it to bind off/ ignore the stitches from the centre.
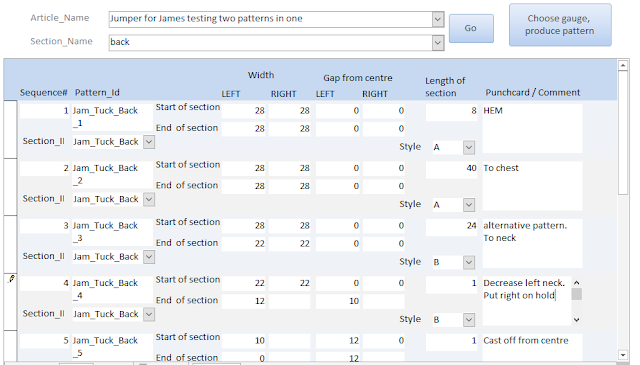
My input form looks like this:
Note the addition of "style" and "comment". I introduced the "Style" option so that I could introduce an element of pattern into a garment, and account for the gauge. For example, knitting two stranded fairisle will give a tighter gauge for the same tension than knitting plain stockinette, and knitting a tuck stitch pattern (intended style B in this pattern) tends to give a much wider, squatter knit for the same tension. In practice I play about with the tensions so that I'm not adding or decreasing a lot of stitches in between styles.
Once this is completed for all the parts of the item of clothing you want to copy, you have an algorithm that can be used to create your
I compiled a gauge table, where I have knit up my frequently used yarns with different tensions and stitches, and measured the row/ st per cm. I use a query to apply my chosen yarn and stitch to each section.
When I want to pull out a pattern, I go to the above form and select the pattern, then for as many styles as are in the pattern, I select the yarn, stitch and tension. I can compare the gauges before drawing up the pattern.
Now you have a pattern to apply to your knitting machine. In sequence 3, the command is to decrease every 11.8 rows. This is just a guide so you can get from the 81 to 64 width in 207. You might end up decreasing by 3 every 35 rows, I like those bunched decreases.
I imagine there is some software out there* that can do this for you, but I find this way fairly easy to work with. I've played about with the GUI (hoho, bit of a grand name for what I have made) to make it easier to read and understand, after I made a tunic by accident instead of a jumper when I misread an old pattern. Whoops!
This blog has been quite dry, so here are some disguises for eggs I drew in case you need to disguise some eggs
*definitely there is


No comments:
Post a Comment